
How to Set Up Tiered Pricing on Shopify (Native + App, 2026)
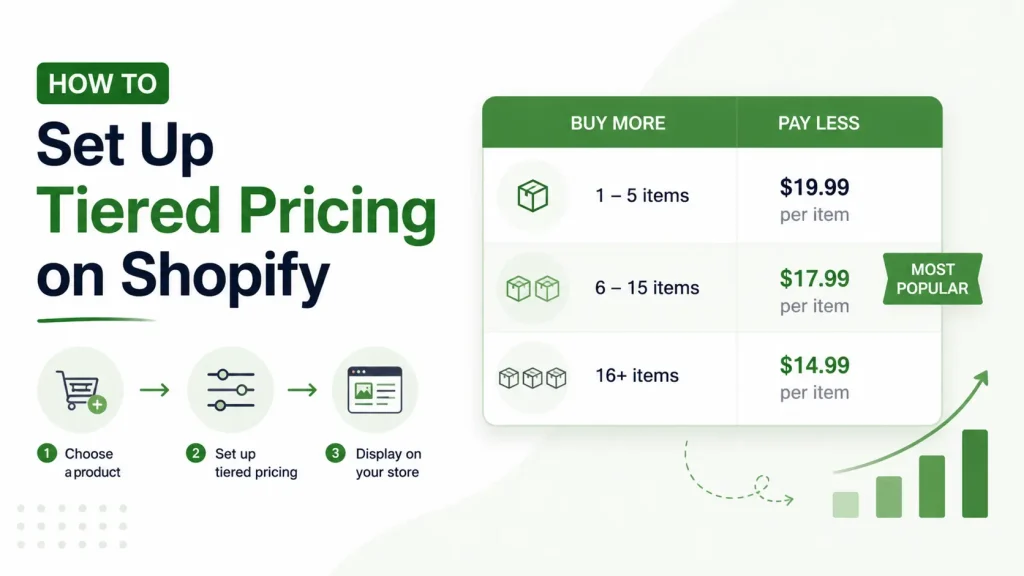
Short answer: To set up tiered pricing on Shopify without an app, create one automatic Amount off products discount per tier (3+, 6+, 12+), each with a higher Minimum quantity of items and percentage. Shopify applies the best qualifying tier. Native tiers show only in the cart; a visible tier table needs an app, and wholesale breaks need B2B catalogs.
Key Facts (Verified 11 October 2026)
- Native path: Discounts → Create discount → Amount off products → Automatic discount → Minimum quantity of items; only items under "Applies to" count toward the minimum (Shopify Help: Amount off discounts).
- Limits: 25 active automatic discounts per store; a customer can use at most 5 product or order codes plus 1 shipping code per order (Shopify Help: Combining discounts).
- Stacking rule: two product discounts combine on the same item on Shopify Plus only; elsewhere Shopify applies the best discount for the customer, which is what a tier ladder needs (same source).
- B2B price breaks: Volume pricing allows up to 10 price breaks per product, set per variant, under Markets → Catalogs → Manage products and pricing (Shopify Help: Quantity rules and volume pricing).
- B2B is no longer Plus-only: since April 2, 2026, Basic, Grow and Advanced plans get up to 3 active B2B catalogs with volume pricing; unlimited catalogs and direct company assignment stay on Plus (Shopify Changelog, B2B features by plan).
Which "tiered pricing" do you actually need?
On Shopify the phrase covers three mechanisms in three parts of the admin. Pick your row first.
| Goal | What it is called on Shopify | Where you set it up | Who sees it |
|---|---|---|---|
| Cheaper per unit at 3, 6 or 12 units of one product or collection | Quantity tiers / quantity breaks / volume discount | Discounts → Amount off products with Minimum quantity of items (Method 1), or a tier-table app (Method 4) | Every retail shopper |
| Bigger discount as the cart total grows ($75 → 10%, $150 → 15%) | Spend tiers / order discounts | Discounts → Amount off order with Minimum purchase amount, one per rung | Every retail shopper |
| "Buy 2, get 1 free" style steps | Buy X get Y | Discounts → Buy X get Y (Method 2) | Every retail shopper |
| Wholesale list where 24 units cost $8.00 each and 96 cost $7.20 | B2B volume pricing / price breaks, plus quantity rules | Markets → Catalogs (Method 3) | Logged-in B2B company buyers only |
Most DTC stores want the first row: Method 1 is the free version, Method 4 the version shoppers can see. Wholesale accounts go to Method 3. For how breaks differ from plain sales, see quantity breaks vs regular discounts.
Every method below uses the same example: a $25 product with 3+ units → 10% off, 6+ → 15% off, 12+ → 20% off. Write your own ladder down first, because each native tier is a separate discount record.
Method 1: Native automatic discounts (free, every plan)
Shopify has no "tiers" screen. You build a ladder from separate automatic discounts that share the same products and differ only in minimum quantity and value.
Step 1: Create the first tier
- In Shopify admin, open Discounts and click Create discount.
- Choose Amount off products from the discount type list.
- Under Method, select Automatic discount and enter a Title. Shoppers see this title in the cart and at checkout, so write it as the offer: "Buy 3+, save 10%".
- Under Discount value, choose Percentage and enter 10. If your store sells subscriptions, Purchase type lets the tier apply to One-time purchase, Subscription or Both.
- Under Applies to, choose Specific collections or Specific products and add the items. To limit the tier to certain variants, expand the product in the picker and tick only those.
- Under Minimum purchase requirements, choose Minimum quantity of items and enter 3. Only the items the discount applies to count toward this minimum, so three different products from the same collection do count together.
- Under Eligibility keep All customers for a public ladder. For a different ladder per group, such as a wholesale or VIP segment, choose Customer segments or Specific customers; for a regional tier, choose Markets.
- Under Combinations, leave Product discounts unticked. Tick Shipping discounts if you run free-shipping codes, and Order discounts only if you want a sitewide sale to stack on top of the tier.
- Under Active dates, set the start date and leave the end date empty for an evergreen ladder. Click Save.
Step 2: Repeat for tiers two and three
Create a second automatic discount with the same products, Minimum quantity of items 6 and 15%, then a third with 12 and 20%. Give each a distinct title, because the winning title prints on the order, and name them "Tier 1 / 2 / 3" so they are easy to find.
Percentage scales with variant prices, so it is the safe choice. With Fixed amount, leave Only apply discount once per order unticked so the amount comes off each eligible item, not the order once.
How Shopify picks a tier when several qualify
At 6 units both the 3+ and 6+ discounts qualify. Shopify's rule: "when multiple discounts apply to the same items and can't be combined, then Shopify automatically applies the best discount for the customer", so the shopper gets 15%, not 10% plus 15%. On Basic, Grow and Advanced this is guaranteed, because product discounts combine on the same item on Shopify Plus only.
On Plus the checkbox matters: if every tier has Product discounts ticked under Combinations, 10% and 15% combine on the same line and your 6-unit tier quietly becomes 23.5%. Leave it unticked on all three.
Spend tiers use Amount off order instead
For "$75 → 10%, $150 → 15%", choose Amount off order with Minimum purchase amount, one automatic discount per rung. To mix free shipping, gifts and percentages in one progress bar, see stacking buy-more-save-more discounts.
Check your free-shipping threshold before you pick the first rung, so the two offers do not collide or repeat each other.
What native tiers cannot do
- No tier table on the product page. The shopper sees one price until the cart, where the discount appears as a titled line under the subtotal. Nothing says 6 units would be cheaper per unit.
- The 25-cap includes apps. Discounts created by apps through Shopify Functions count toward the 25 active automatic discounts; a three-tier ladder on eight collections already uses 24 slots.
For a couple of hero products this is fine. For tiers across many products, or when shoppers must see the ladder before adding to cart, use Method 4. The ultimate guide to quantity breaks goes deeper on the mechanics.
Method 2: Buy X get Y for "buy 2, get 1 free" tiers
"Buy 2, get 1 free" is a 33% discount on three units, deeper than most percentage tiers, and it needs a different discount type.
- Go to Discounts → Create discount → Buy X get Y, choose Automatic discount and enter a Title.
- Under Customer buys, select Minimum quantity of items, enter 2, and under Any items from pick Specific products or Specific collections.
- Under Customer gets, set Quantity to 1, pick the same products, and under At a discounted value choose Free (or Percentage / Amount off each for a partial reward).
- Tick Set the maximum number of uses per order and enter 1 unless you want a 6-unit cart to become "buy 4, get 2".
- Set Combinations and Active dates as in Method 1, then Save.
The rule that trips people up, from Shopify's docs: "customers must add all items to their cart manually. The free or discounted 'get' item is never automatically added to the cart." The shopper puts three units in the cart and one drops to $0.00; auto-adding it is an app job. Buy X get Y is a product-class discount, and Shopify's combining rules are stricter for it: outside Plus, every product in a Buy X get Y discount is ineligible for further product discounts, so a quantity tier or code on the same product competes with it and the best value wins.
Method 3: B2B catalogs with quantity rules and volume pricing
Retail automatic discounts are not wholesale price lists, so wholesale needs Shopify B2B: catalogs carry their own prices and real price breaks for company buyers. Since April 2, 2026 this works on Basic, Grow and Advanced as well as Plus. Non-Plus plans get 3 active catalogs in total across their B2B markets, and the store must be on the new Shopify Markets; Plus gets unlimited catalogs and direct assignment to companies and locations.
- Set up at least one company under Customers → Companies with a location and a buyer.
- Go to Markets → Catalogs and create a catalog. Choose which products it contains and the base pricing: an overall percentage adjustment or fixed prices per product.
- Open the catalog, click Manage → Manage products and pricing, and find the product.
- Under Quantity rules, set Minimum (fewest units a buyer can order), Maximum, and Increment (case packs, for example 6).
- Under Volume pricing, add a price break: Quantity 24 and Unit price $8.00, then another at 96 and $7.20. Shopify allows up to 10 price breaks per product.
- Link the catalog to your B2B market (non-Plus) or assign it directly to the company location (Plus). Save.
Three behaviours to know. First, quantity rules and volume pricing apply per variant; in Shopify's own hat example, "customers can't combine 5 gray hats and 5 blue hats to meet the minimum of 10 hats", so if buyers mix colours, keep the minimum low. Second, a price break replaces the price outright: a 96-unit order pays $7.20 on every unit, not only the units above 96. Third, once a product has volume pricing its price is fixed, so a catalog-wide percentage adjustment no longer applies to it, and each break's quantity must exceed the minimum and be a multiple of the increment (24 and 96 both work with an increment of 6).
Shopify's Trade theme and quick order list, both on every plan, show those breaks to logged-in company buyers; retail shoppers never see the catalog, so a blended store keeps its retail ladder in Method 1 or 4.
Method 4: An app that shows the tier table (product page and cart drawer)
Apps in this category render the ladder where the shopper decides and apply the discount without a code. Most create it through Shopify Functions, so it appears at checkout like any automatic discount and counts toward the 25-active limit.
Tiers in the cart drawer: Oxify Cart Drawer & Upsell
In our cart drawer app the setting lives in the Volume Discount section. Switch Volume Discount active to On, click Add Tier, set the Target Type to All Products, Specific Products or Specific Collections, then click Add Quantity Tier once per rung and enter its quantity and discount. The drawer turns each rung into a button under the line item ("Buy 2 save 10%", "Buy 3 save 15%"); a tap updates the quantity, the line shows the struck-through price, the new price and "You save $X", and the discount is applied at checkout. The cart drawer quantity breaks guide covers the copy for that panel.

Tiers on the product page: Oxify Quantity Breaks & BYOB
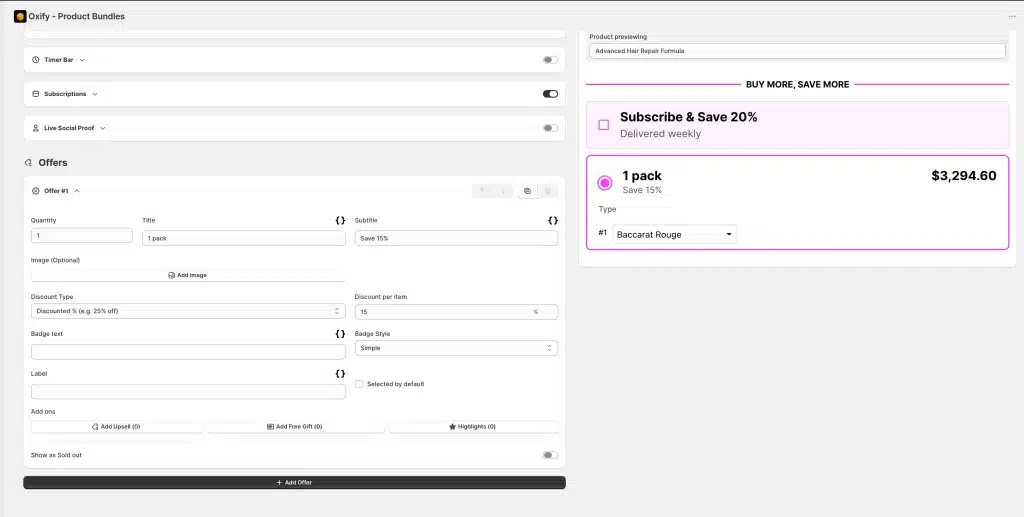
For a "Buy more, save more" table on the product page, or pack tiers where each pack can hold different variants, use our separate Oxify Quantity Breaks & BYOB app (4.9 stars, 13 reviews, Built for Shopify, $14.99/month with every feature included and a 14-day free trial). Each row is an Offer: set Quantity, Title ("2 pack"), Subtitle ("Save 15%"), Discount Type and Discount per item, tick Selected by default on the rung to pre-choose, and click + Add Offer for the next rung.
Tiered pricing apps verified on 11 October 2026
| App | Rating (reviews) | Pricing | Built for Shopify | Where the tiers show |
|---|---|---|---|---|
| Oxify Cart Drawer & Upsell (our app) | 4.9 (40) | From $9.99/month by order volume, 14-day free trial | Yes | Cart drawer tier buttons with line-item savings, plus product-page upsell widgets |
| Oxify Quantity Breaks & BYOB (our app) | 4.9 (13) | One plan, $14.99/month or $129.99/year, every feature included, 14-day free trial | Yes | Product-page "Buy more, save more" table, bundles, build-your-own-box |
| Kaching Bundles App & Upsells | 5.0 (6,264) | Free on development stores only; paid plans $14.99, $29.99 and $59.99/month by additional revenue (up to $1,000, $5,000, $10,000), 7-day free trial | Yes | Product-page volume discount table and bundles |
| Pumper Bundles Quantity Breaks | 4.9 (3,551) | Free plan that lists quantity breaks; paid plans $9.99, $29.99 and $49.99/month by extra revenue (up to $1,000, $5,000, unlimited), 7-day free trial | Yes | Product-page quantity breaks, bundles, BOGO |
| Bundler » Product Bundles App | 4.9 (2,722) | Free plan that lists volume discounts and quantity breaks; paid plans $9.99 and $19.99/month, 7-day free trial | Yes | Product-page quantity breaks, mix and match, tiered discounts |
Kaching is the safest pick on review volume. Pumper and Bundler both list quantity breaks on their free plans, so you can test a ladder without paying; Kaching's free tier covers development stores only, and its paid plans step up with the additional revenue the app generates. Skip a tier app if the ladder covers a few hero products and the cart line is enough (Method 1 is free), or if your buyers are wholesale companies (Method 3); that goes for both Oxify apps too. Longer comparisons: best Shopify quantity breaks apps and best Shopify volume discount apps.
How the tier shows to shoppers
| Surface | Native automatic discount | Tier app |
|---|---|---|
| Product page | One price, no table, no hint that 6 units are cheaper. | Tier table with per-unit price, saving and a pre-selected rung. |
| Cart line item | Full price on the line; a titled discount line under the subtotal once the minimum is met. | Struck-through price, new price and "You save" on the line. |
| "Add 1 more to save" nudge | None. | Next-rung button beside the quantity stepper in the drawer. |
Tier design rules
Three tiers, not five
Three rungs give a clear low, middle and high. The middle rung takes the badge and the pre-selected state. Tempted by a fourth? Read how many quantity break tiers you need first.
Set thresholds from your units per order
Do not copy 3 / 6 / 12 from this article. Export your last 90 days of orders (Orders → Export), filter the CSV to one product and count line-item quantity per order. The first tier goes one unit above what most orders already contain (mostly 1 or 2 units → first tier 3), the second is about double the first, the third is the case size. A rung shoppers hit by accident is a giveaway, not a tier.
Set a margin floor before you set percentages
Say a product sells for $25.00, costs $10.00 landed, and you need a 45% gross margin after the tier to keep paying for ads and shipping. The lowest allowed price is $10 ÷ (1 − 0.45) = $18.18, so the deepest discount you can offer is 27%. A 20% top tier fits; 30% does not.
| Tier | Price per unit | Gross margin per unit | Margin % | Order total | Gross profit per order |
|---|---|---|---|---|---|
| 1 unit, no tier | $25.00 | $15.00 | 60.0% | $25.00 | $15.00 |
| 3 units, 10% off | $22.50 | $12.50 | 55.6% | $67.50 | $37.50 |
| 6 units, 15% off | $21.25 | $11.25 | 52.9% | $127.50 | $67.50 |
| 12 units, 20% off | $20.00 | $10.00 | 50.0% | $240.00 | $120.00 |
Every rung stays above the 45% floor and gross profit per order climbs each step. If your bottom row breaks the floor, shrink the percentage rather than removing the rung. More ladder structures: quantity break strategies for AOV.
Testing the ladder
- Walk the quantities. In a private window add 2 units (no discount), then 3, 6 and 12. The subtotal line should switch to the higher tier's title at each step and never show two tier titles at once.
- Cross the collection. If the tier applies to a collection, add 2 units of one product and 1 of another. The 3+ tier should fire.
- Try a code on top. Enter your free-shipping code and a product code. Confirm the behaviour matches the Combinations boxes you ticked.
- Place a test order. Turn on Shopify Payments test mode under Settings → Payments, check out, and read the discount line on the order and the confirmation email.
Troubleshooting
- The discount is not applying. Check in order: Active dates (still Scheduled?), Applies to (an automated collection the product no longer matches), Minimum quantity (only eligible items count), Eligibility (market, segment or named customers), Purchase type (a subscription-only tier ignores one-time items), and whether a bigger discount that cannot combine is winning.
- It applies to the wrong variants. Adding a product under Applies to includes every variant. Expand the product in the picker, untick the variants to exclude, and Save.
- Shoppers stack a code on the tier. Untick Product discounts under Combinations on the tier; the code and the tier then compete and the better one applies. The hard limit is 5 product or order codes plus 1 shipping code per order.
- B2B buyer never reaches the price break. Volume pricing is per variant. They are splitting the quantity across variants, which does not count toward the break.
- App tiers show but checkout charges full price. The app's Function discount is deactivated or blocked by the 25 limit; look for the app's entry in Discounts.
Show the next tier where the shopper is already deciding
Native discounts price the tier; a cart drawer sells it. Oxify Cart Drawer & Upsell turns each Volume Discount tier into a one-tap button in the slide cart, prints the saving on the line item and applies the discount at checkout with no code. Built for Shopify, 4.9 stars from 40 reviews, from $9.99/month with a 14-day free trial: install Oxify Cart Drawer & Upsell or read the cart drawer upsell feature page.