 Oxify App
How to Add Quantity Breaks to Shopify: Complete Setup Guide
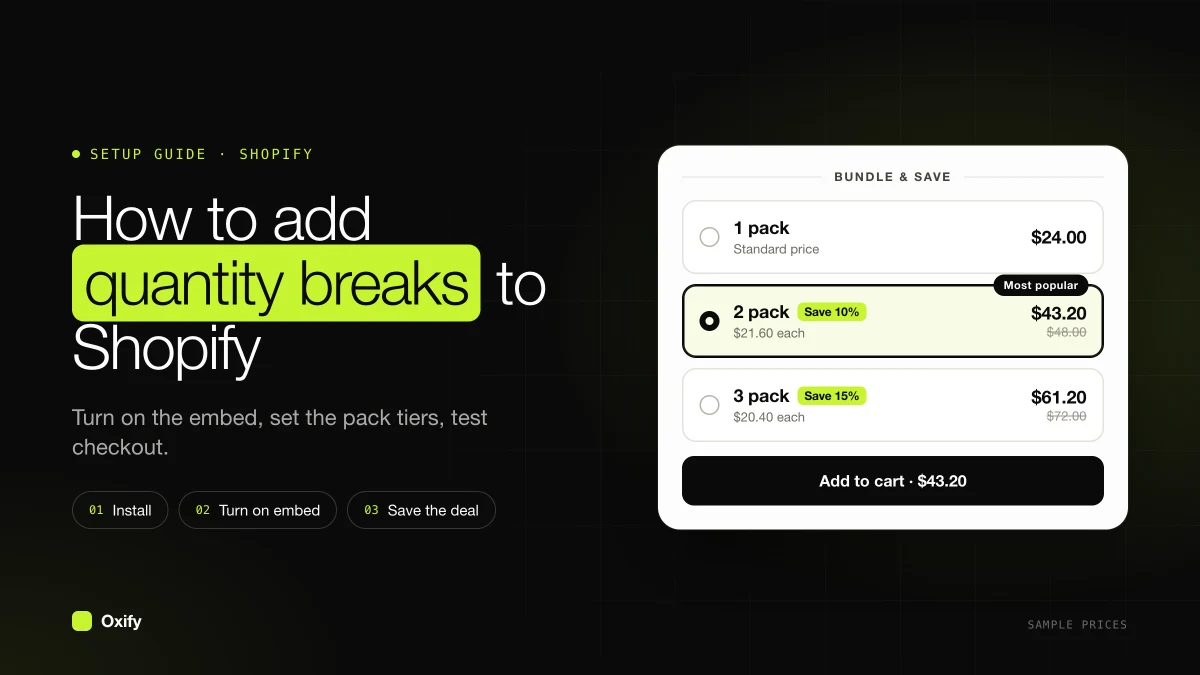
Short answer: Here is how to add quantity breaks to Shopify. If shoppers should see the packs on the product page, install Oxify Bundles & Quantity Break, turn on the Oxify: Product Bundle embed, and save a Quantity Breaks deal. They tap 2 Pack or 3 Pack. That many units go in the cart. One automatic discount, named Oxify Bundle Discount, cuts the price at checkout. Your product price in admin stays the same.
If you only need the cut in the cart, skip the app. Make one automatic Amount off products discount per tier. Wholesale price lists are a third path: B2B catalog volume pricing, and only logged-in company buyers see those prices.
The Oxify clicks below follow the quantity break docs. The longer native and B2B click path is in how to set up tiered pricing on Shopify.
Key facts (checked 16 November 2026)
- Shopify's discount types are Amount off products, Amount off order, Buy X get Y, and Free shipping. Shopify points stores that need tiered discounts to apps (Shopify Help: Discount types).
- A store can have 25 active automatic discounts (Shopify Help: Combining discounts). Oxify keeps one discount for every deal, named Oxify Bundle Discount (How quantity breaks work).
- The Quantity Breaks template starts as 1 pack at full price, 2 pack at 10% off, and 3 pack at 15% off. The heading shoppers see starts as BUY MORE, SAVE MORE (Choose a template).
- On themes the app recognizes, the offer hides the theme's quantity box and the Buy it now button, so the pack is how shoppers pick a quantity.
- The App Store listing shows Built for Shopify and 4.9 from 13 reviews. The app is free.
On this page
- Pick the path
- What you are adding
- Before you click anything
- Install and turn the embed on
- Create the three packs
- Pick the right discount type
- Cart-only tiers, with no app
- Wholesale price breaks
- Choose which products show it
- Test the cart and checkout
- If the offer does not show
- After launch: analytics and A/B tests
- Comparing apps
- FAQ
Pick the path before you click
Stores set this up in three different places. They are not the same screen in Shopify admin.
| You want | Where it is | Who sees the lower price |
|---|---|---|
| Packs on the product page | Oxify Bundles & Quantity Break | Every shopper, before they add to cart |
| A quieter cut, only after the cart | Discounts → Amount off products → Automatic | Every shopper, in the cart and at checkout |
| A wholesale price list | Markets → Catalogs → Volume pricing | Logged-in company buyers only |
Here is what each path can and cannot do. This is the part most setup guides skip, and it decides which one you need.
| Question | Oxify packs | Native automatic discounts | B2B volume pricing |
|---|---|---|---|
| Pack list on the product page? | Yes | No, the cut shows in the cart | Price table for company buyers |
| Several tiers in one setup? | Yes, all in one deal | No, one discount per tier | Yes, up to 10 per product |
| Uses how many of your 25 automatic discounts? | 1 for every deal | 1 per tier | None |
| Shopper mixes colors in one pack? | Yes, with per-item pickers | Only if the discount targets a collection or several products | No, per variant |
| Free gift on the top tier? | Yes | Needs a separate Buy X get Y | No |
| A/B test the tiers? | Yes, up to 3 versions | No | No |
| Works on Shopify POS? | Not covered in its docs (built for the online store) | Yes, at POS Pro locations | No |
| Cost | App plan | Free | Free on Basic and up |
The POS row comes from Shopify: automatic discounts apply in stores only at locations on POS Pro, and you cannot make one that works in POS only (Shopify Help: Amount off discounts).
Use a code only when you want the shopper to type one. A quantity break should apply by itself. Some older guides build each tier as a discount code. That works, and it also hides the deal from anyone who never enters the code. Automatic is the native path that matches the offer.
What you are adding
A quantity break is a list of offers for the same product. Each row is one quantity and one price.
| What the shopper taps | Units added | Price on a $10 item |
|---|---|---|
| 1 Pack, no discount | 1 | $10.00 |
| 2 Pack, 10% off each | 2 | $18.00 |
| 3 Pack, 20% off each | 3 | $24.00 |
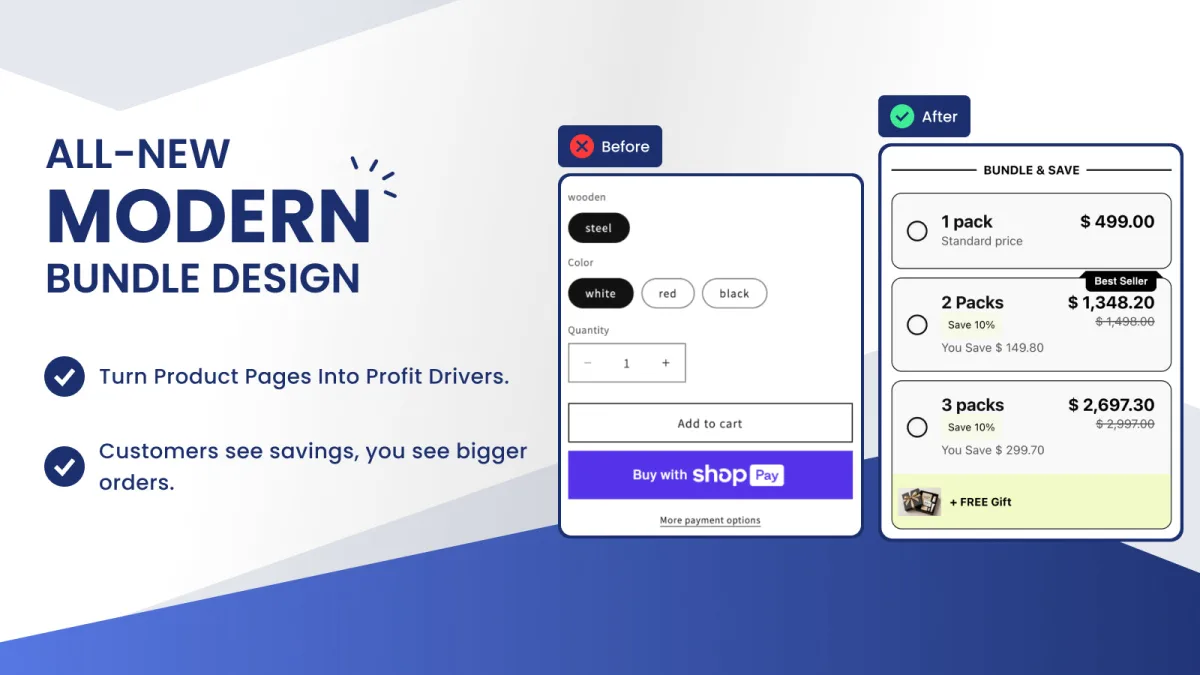
The row marked Selected by default is highlighted when the page loads. If you leave that box empty, the first row that is not sold out is highlighted.
Free gifts tied to that row are added with the units. So is any upsell the shopper ticks. The steps for gifts are in the free gifts doc.
Before you click anything
Write three numbers on paper first. A random 10% and 20% is how stores give away margin.
- Your product price. Use the real price, not a rounded guess.
- Your product cost. What you pay before ads. Call the gap your profit on one unit.
- The quantity most orders already have. If most people buy 1, the first deal should be 2. If most people already buy 3, a deal at 3 hands them a discount for doing nothing new. The count is in Shopify quantity discounts and units per order.
Check profit in dollars on the whole order.
One unit at $20 with an $8 cost leaves $12. Two units at 10% off are $18 each. Profit is $10 a unit, so $20 on the order. That is $8 more than the single sale.
If the bigger order leaves less than $12, the deal loses money every time someone takes it.
Three rows is enough for a phone screen. More on that choice: how many quantity break tiers to use.
Step 1: Install the app and turn the embed on
- Open Oxify Bundles & Quantity Break and add it to the store.
- In the app, open Home. In the Setup Guide, click Activate on Activate Oxify Product Bundles.
- The theme editor opens on App embeds. Find Oxify: Product Bundle. Switch it on. Click Save.
There is a second switch named Oxify: Bundle Builder. Leave that one for build-a-box pages. Quantity breaks need Product Bundle. Both can be on. They do different jobs. Details: Enable the app embed.
Home shows a green On badge when the published theme has the embed. A yellow Off badge means no offer can show, even if the deal says published.
If you publish a new theme later, turn the embed on again. That is the most common reason a live offer vanishes.
Step 2: Create the packs
- On Home, click Add new deal. On a new install you can also click Create Bundle Set.
- On the Quantity Breaks card, click Create Bundle. Nothing is saved until you click Save, so you can look around and leave.
- On Bundle Settings, change Name. Shoppers never see this. Use a name you will know later, such as "Serum packs".
- Change Block title. Shoppers do see this. The template starts with BUY MORE, SAVE MORE. A clearer line is fine, such as "Bundle & Save".
- Click Continue to Offers.
The template already has three rows. Edit them like this for a $10 product. Swap in your own price and percents.
- Offer 1: Quantity
1. Discount Type No Discount. Title1 Pack. - Offer 2: Quantity
2. Discount Type Discounted %. Discount per item10. Title2 Pack. SubtitleSave {{saved_percentage}}. - Offer 3: Quantity
3. Discount Type Discounted %. Discount per item20. Title3 Pack. SubtitleSave {{saved_percentage}}.
Tick Selected by default on the row you want highlighted. Only one row can have that tick. For most stores that is the 2-pack, the one you hope people pick. The preview updates as you type.
{{saved_percentage}} fills in the real percent. If you later change 20 to 25, the words update. Typing "Save 20%" by hand goes stale. The full list is in text variables.
On the 2-pack, set Label to {{new_price_per_item}} per item. That line shows the price of one unit inside the pack.
Badge one row only. A badge on every row highlights nothing.
Badge text works in the horizontal layout, which is what the template uses. The Most Popular badge style always says "Most Popular" and ignores your badge text. Use the Simple style if you want your own words, such as Best Value. See badges, labels, and images.
Let shoppers mix sizes or colors in one pack
By default, every unit in a pack is the same variant. A sock shopper who wants one black, one navy, and one gray pair cannot do that, and often leaves.
- Stay on the Bundle Settings tab. Open Advanced Settings and find Variants.
- Tick Let customers choose different variants for each item. A 3-pack now shows three pickers.
- If the page shows two pickers, yours and the theme's, tick Hide theme variant picker.
- Save, add a mixed pack to the cart, and check the right variants landed there.
The discount stays the same whatever variants the shopper picks. Turn this on for clothing, colors, and flavors. Leave it off when one variant per order is normal. Source: Variant settings.
Show the pack price at the top of the page
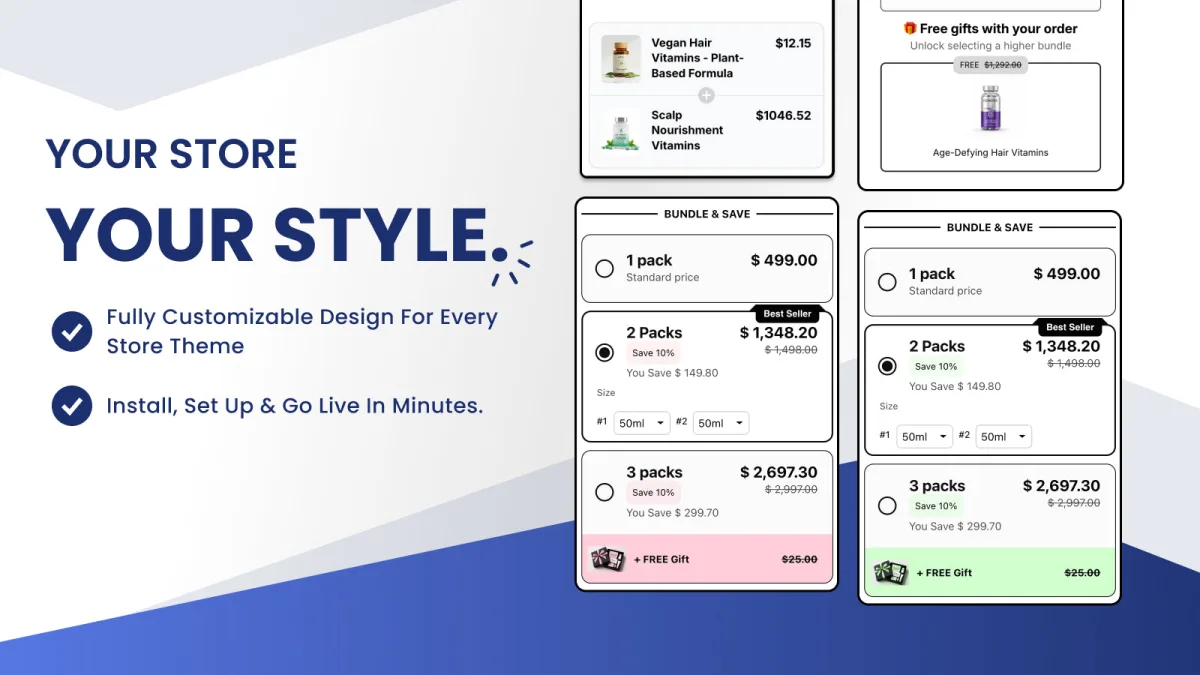
Your theme's main price still shows one unit. When someone picks the 3-pack, that number is now wrong. In Advanced Settings, under Pricing, tick Update theme product price and choose Price per item or Bundle price. Tick Show prices per item too if your packs are different sizes, so "$9.00 each" sits next to "$10.00". See Pricing settings.
Step 3: Pick colors and save
- Open the Design tab. Open Colors. Click a color circle. Check the preview.
- A new deal is set to publish. The top button reads Unpublish. Leave it if you want the offer live on Save.
- Click Save. You should see Bundle Set Saved Successfully.
- Want it saved but hidden? Click Unpublish first, so the button changes to Publish, then click Save. Click Publish and Save when you are ready.
Which discount type to use
Every row has a Discount Type menu. The number you type does not mean the same thing in each one. This table uses a $10 product and a quantity of 3. Source: Discount types.
| Menu option | What the number means | 3 units of a $10 item |
|---|---|---|
| No Discount | Full price. Use this on the 1-pack. | $30.00 |
| Discounted % | Percent off each item. Type 20 for 20% off. | $24.00 |
| Amount Off | Dollars off each item. Type 2 and three items lose $6. | $24.00 |
| Fixed Price | The price of the whole pack. Type 24 and the 3-pack costs $24, not $24 each. | $24.00 |
Use a percent when one deal covers many products at different prices. Use a fixed price when you want the words "3 for $24" and the products cost about the same. A fixed price never raises a price. If the items already cost less than your fixed price, the shopper pays the normal total.
Percents are rounded down to the cent on each item, the same way Shopify does it. A 15% cut on $23 lands on $19.55. If you want $19.99, turn on Price rounding in Advanced Settings and choose .99. That switch is on the Bundle Settings tab, under Pricing settings.
Cart-only tiers, with no app
Shopify has no quantity-break screen for a normal store. You build the ladder from separate automatic discounts. Each one has a single minimum quantity. Shopify's help page calls this Amount off products.
- Go to Discounts → Create discount → Amount off products.
- Choose Automatic discount. Title it the way it should read in the cart, such as "Buy 2, save 10%".
- Set the value to 10%. Apply it to the specific product or collection.
- Under minimum purchase requirements, choose Minimum quantity of items and enter 2.
- Under Combinations, leave Product discounts unticked, so a second tier does not stack on top of this one. Save.
- Repeat for the next tier: same products, minimum 3, value 15%.
A cart with 3 units qualifies for both discounts. When they cannot combine, Shopify applies the best discount for that cart, so the shopper gets 15%, not 10% plus 15% (Combining discounts).
Two limits matter. You can have 25 active automatic discounts, and app discounts count toward that 25. And if the discount targets a collection, every eligible item counts together: one red candle and two blue ones can hit a "buy 3" rule. There is no native switch for "3 of this exact variant only."
Nothing in that setup draws a pack list on the product page. The price in your catalog does not change either. The cut shows up once the quantity is in the cart.
Wholesale price breaks
B2B catalogs have a real volume-pricing column, up to 10 price breaks per product, set per variant. Open Markets → Catalogs, open the catalog, then Manage products and pricing. A buyer must hit the quantity on that variant. Ten blue hats and ten gray hats do not add up to a 20-hat break (Shopify Help: Quantity pricing).
Those prices are for company buyers on the catalog. A retail shopper on the same product page does not get them. Basic, Grow, Advanced, and Plus can use B2B catalogs. The plan limits are on Shopify's B2B plan page.
Which products show the offer
Visibility is on the Bundle Settings tab. Start with Specific selected products while you test. Move to a collection once the test order looks right.
- All products shows it on every product page.
- Specific selected products shows it only on the products you pick.
- Products in selected collections follows the collection, including products you add later.
- All products except selected is how you keep the deal off gift cards and sale items.
Only one offer can show on a product page. A deal aimed at specific products beats a deal aimed at a collection. A collection deal beats an "all products" deal. If two deals tie, the one for a specific market wins, then the older deal. Full rules: Choose where the offer appears.
The offer sits near the Add to cart button on its own. To move it, add the Oxify: Product Bundle app block in the theme editor and drag it. The block only marks the spot. The embed still has to be on.
Test it the way a shopper will
- Open the product on the storefront, not only in the preview. You should see the packs, and the theme quantity box should be gone.
- Tap the 3-pack and add to cart. Three units should land in the cart, not one.
- The cart may show full price for a moment. The discount is applied at checkout. Open checkout and read the discount line. It should be Oxify Bundle Discount.
- In the cart, lower the quantity. The shopper gets the best pack their new quantity still reaches, or no discount.
- With Show quantity selector off, the discount covers whole packs. On a 3-pack, 7 units means 6 are discounted and the 7th is full price. With that selector on, every unit gets the discount. Test both if you turn the selector on.
In Shopify admin, open Discounts and confirm Oxify Bundle Discount is active. If that discount is off, the page can still show the packs while checkout charges full price.
Three things that charge full price by surprise
- Units added somewhere else. The discount covers items added with the product page's Add to cart button while the offer shows. A quick-add button on a collection page or a cart drawer recommendation adds the item at full price.
- Too many published deals. All deals share limited room in the one checkout discount. Deals with many tiers, gifts, or A/B versions use more. If room runs out, the app shows a red message on save naming the deals that will not be discounted. Unpublish old ones.
- Other currencies. Amount Off and Fixed Price are typed in your store currency and converted at checkout with Shopify's exchange rate for that market. Percent deals are not affected. Test one order in a second market.
Draft orders and previews do not run the discount the same way. A small live order you refund is the real test. Source: Discount not applying at checkout.
Decide if coupons can stack on the pack
A shopper takes the 3-pack at 20% off, then types a 15% welcome code. Can they use both? You decide.
- In Oxify: open Settings in the app menu. Under Discounts, switch on Turn off discount combinations if you never want a product or order code on top of a pack. Free shipping codes still work. Click Save.
- Leave it off when you want email or loyalty codes to stack. The other discount must allow combining too.
- Shopify Plus only: two product discounts can stack on the same line with tags that match both ways. Other plans get one product discount per line, and the best one wins.
Run the profit math with the code on top before you allow it. 20% plus 15% is about 32% off the pack. Source: App settings.
Skip the cart and send people straight to checkout only if you sell one product and you do not use cart upsells. The switch is in Advanced Settings, and it is off by default. See Cart settings.
If the offer does not show
- Embed is Off. Home should say On for the published theme. Draft themes do not count.
- You saved it as unpublished. Open the deal and click Publish, then Save.
- The product is outside Visibility. Switch to All products for one test. If it appears, the product picker was the problem.
- Another deal is winning. A more specific deal on that product hides this one.
- You turned on the wrong embed. Bundle Builder does not draw quantity breaks.
The picture guide is Offer not showing. If the packs show and checkout is still full price, use Discount not applying at checkout.
After launch: check which pack people pick
Setup is day one. The money is in week three, when you know which row people actually tap.
- Analytics. Open Analytics in the app menu. The Bundle conversion chart splits orders by tier, so you see how many took the 1, 2, or 3 pack. The tiles show visitors, bundle orders, extra revenue, and conversion rate against the period before (Analytics).
- A/B test. In the Preview card, click B variant. Version B starts as a copy. Change one thing, such as 15% versus 20% on the 3-pack, and save. Up to three versions can run (A/B testing).
- Wait for real numbers. The app says "Need more data" until both versions have 100 visitors. Treat that as the floor, not the finish line. A small store may need several weeks.
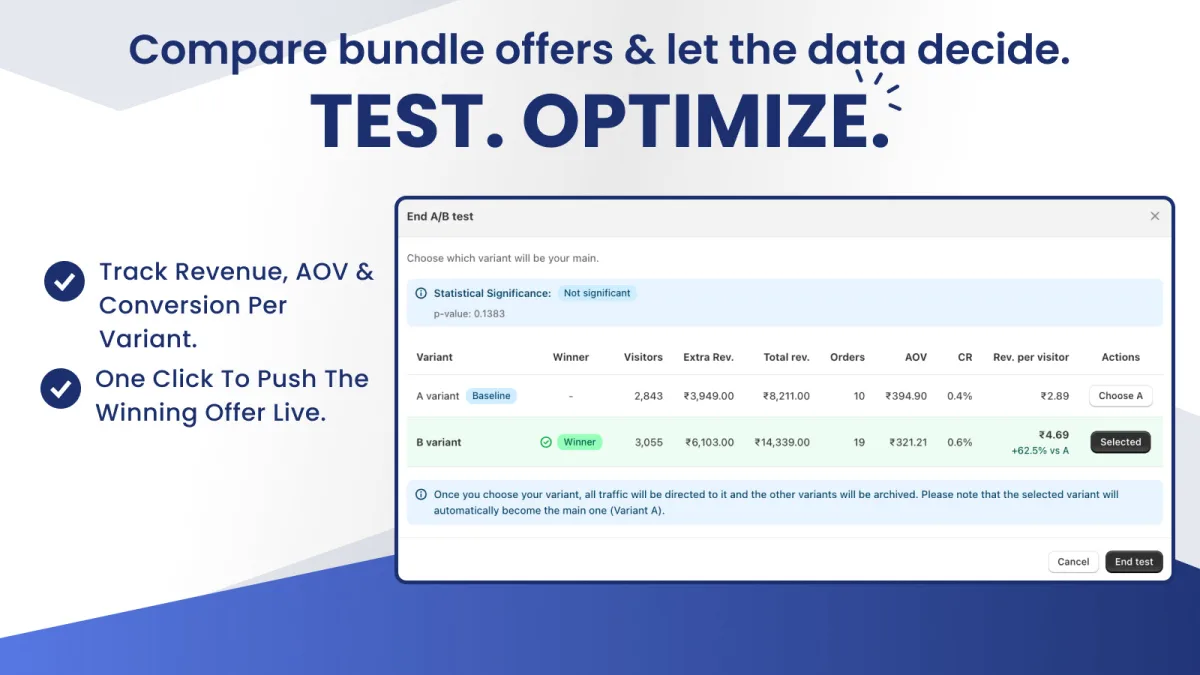
If almost nobody takes the 2-pack, the gap is too small or the badge is on the wrong row. If almost everyone takes the top tier, it may be too cheap. The quantity break strategies guide covers what to change.
Comparing quantity break apps?
The pages that rank for this setup question each walk through one app, usually their own. We do the same with ours. If you want to compare before you install, these are the closest options. Ratings and prices are from our 16-app quantity breaks comparison, checked 1 November 2026.
| App | Rating | How the price grows | Good fit |
|---|---|---|---|
| Oxify Bundles & Quantity Break (ours) | 5.0 (14 reviews) | Free, no revenue cap | Packs, gifts, build-a-box, and A/B tests for free |
| Kaching Bundles | 5.0 (6,565) | Rises with extra revenue | Stores that want the largest review base |
| Bundler | 4.9 (2,764) | Free plan, then flat | A free start |
| Pumper Bundles Quantity Breaks | 4.9 (3,624) | Free start, then by extra revenue | Free starter with a widget |
A store on a tight budget with one product can also run the native discounts above for free. Wholesale-heavy stores should look at the B2B path first.
Where the other guides fit
| You want | Open this |
|---|---|
| The clicks on this page | You are here |
| Native discounts, Buy X get Y, or B2B catalogs | How to set up tiered pricing on Shopify |
| 15 ready-to-copy offers | Shopify quantity breaks: 15 examples |
| The words "buy more, save more" | Buy more save more offers |
| 2-pack, 3-pack, and 5-pack wording | 2-pack, 3-pack, and 5-pack discounts |
| A plain sale versus a quantity deal | Quantity breaks vs regular discounts |
Add the packs this week
Install Oxify Bundles & Quantity Break, turn on Oxify: Product Bundle, and save the Quantity Breaks template on one product. Place a test order before you point ads at it. The picture version of these clicks is Create your first quantity break.